
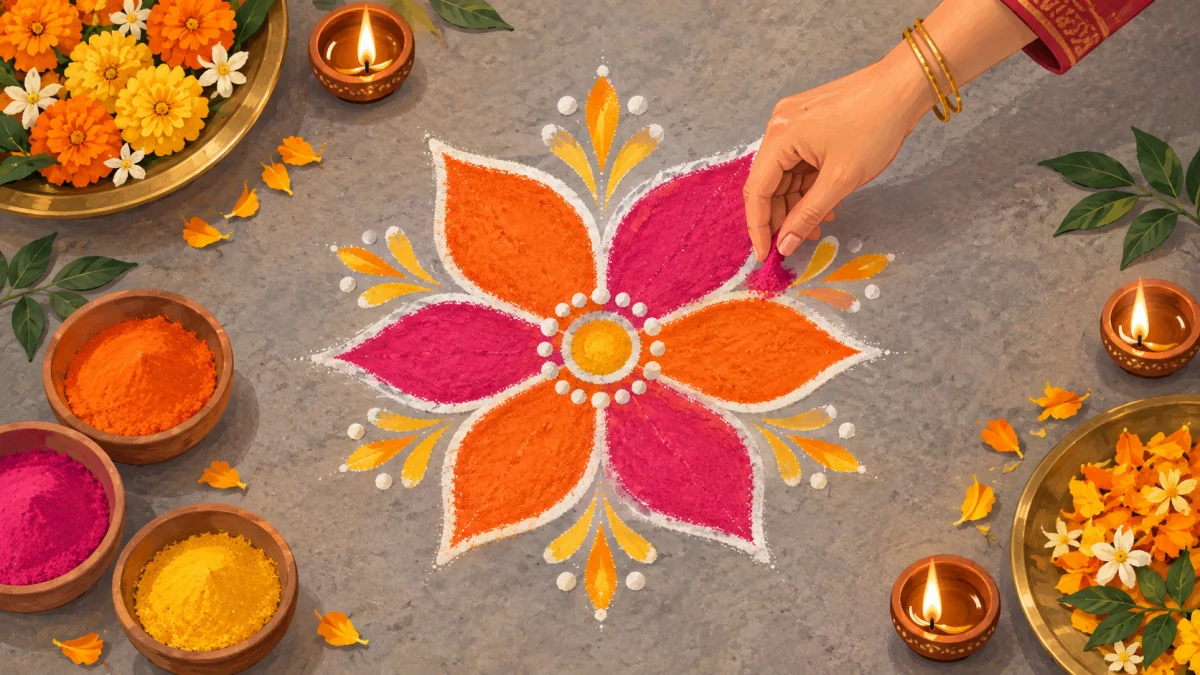
A rangoli looks harder than it is. The huge ones outside temples and in housing-society competitions are drawn by people with decades of practice. Yours only needs to be neat, symmetrical and lit, and any of the five designs below gets you there in under an hour, even if the last thing you drew was a map in a Class 8 geography exam.
For each design you get what you need, the steps, roughly how long it takes and what usually goes wrong. At the end: how to keep a rangoli looking decent through all five days of Diwali.
Materials for all five
- A flat, clean, dry floor. Sweep, then wipe with a barely damp cloth, then let it dry. Powder does not stick to dust or damp.
- White rangoli powder or rice flour. For outlines. Rice flour is cheaper and traditional.
- Three or four coloured powders. Orange, yellow, pink or red, green. Buy small packets; a 100 g packet covers a lot.
- Chalk for marking dots and guidelines. Chalk lines vanish under powder.
- A small spoon, a paper cone, or a squeeze bottle for laying lines. A paper cone (roll a square of paper, snip the tip) gives the most control.
- A ruler or a string for spacing dots.
- Tealights or small diyas to light it. Around 20 tealights and a few glass holders will light two rangolis.
- Marigold petals for designs 3 and 4, about two heads’ worth per 10 cm of ring.
For the powder-laying technique: hold a pinch between thumb and first two fingers, palm down, and let it fall in a thin stream while moving your hand steadily. Practice on a sheet of paper for two minutes first. Lines get straight quickly.
Design 1: The 5×5 dot kolam
The south Indian classic, and the best first rangoli because the dots do the geometry for you.
Time: 20 minutes. Size: about 40 cm.
- With chalk, mark a square grid of 5 rows of 5 dots, 8 cm apart. Use a ruler for the first row and column, then eyeball the rest.
- With white powder, draw a diamond by joining the outermost dots of each side: top-centre dot to right-centre dot to bottom-centre dot to left-centre dot and back.
- Inside it, join the four dots that sit diagonally inward from each corner of the diamond to make a smaller diamond.
- Now go around the outside: at each of the four corner dots of the grid, draw a small loop (a petal shape) that starts from the diamond’s side, curves around the corner dot, and comes back.
- Repeat the loop at the remaining outer dots so every outer dot is enclosed.
- Fill the central small diamond with one colour, the ring between the diamonds with a second, and the loops with a third.
- A tealight at the centre and one at each corner.
What goes wrong: uneven dot spacing, which shows in the finished lines. Take an extra minute on the grid.
Design 2: The six-petal lotus
The Diwali rangoli. Lakshmi’s flower, symmetrical, and forgiving of wobbly lines because the petals are filled in.
Time: 30 to 40 minutes. Size: 50 to 60 cm.
- Mark a centre dot with chalk. Tie a chalk to a 25 cm string, hold the other end on the centre dot, and draw a circle. Draw a second circle at 12 cm.
- Mark six points evenly around the outer circle (a string across the circle gives you two; bisect the arcs by eye for the other four, or use a plate to mark 60-degree steps).
- From each of the six points, draw a petal: two curved lines from the point to the inner circle, meeting the inner circle about 6 cm apart. You now have six petals around an inner circle.
- Between each pair of petals, draw a smaller petal from the inner circle outward, about half the size, so there are twelve petals in two tiers.
- Outline everything in white.
- Fill the inner circle with yellow, the large petals with pink or orange, the small petals with a darker shade or green.
- Add a white or yellow dot pattern along the outer edge of each large petal if you want detail.
- A diya in the centre on a small steel plate; tealights at the tips of the six large petals.
What goes wrong: petals of different sizes. The chalk circle fixes the outer points; keep the inner meeting points the same width apart by measuring 3 cm either side of a line from the point to the centre.
Design 3: The marigold petal ring
The fastest rangoli that looks full. No drawing skill at all.
Time: 15 minutes. Size: any; 60 cm is typical.
- Draw two chalk circles, 30 cm and 20 cm from the centre.
- Fill the outer ring (between the circles) with orange marigold petals, laid thickly so no floor shows.
- Fill the inner circle with yellow marigold petals or a contrasting colour (pink rose petals, white chrysanthemum).
- Place a brass or clay diya at the centre on a small plate, and four tealights in glass holders on the outer ring at the compass points.
- Optional: a thin white powder line just outside the outer ring, to give it an edge.
What goes wrong: petals blow away or scatter when someone walks past. A thin ring of powder or a few whole flower heads around the outer edge weighs the petals down. Petals last two days in shade; replace on the third day.
Design 4: The diya rangoli
For a small space or a doorstep, a rangoli where the diyas are the design.
Time: 15 minutes. Size: 30 to 40 cm wide, or a long strip along a threshold.
- Draw a simple shape in white powder: a diya outline (a shallow bowl with a flame), a swastika, or a straight double line along the threshold.
- Fill the shape with one colour.
- Place small diyas or tealights along the outline, evenly spaced, about 8 cm apart. Odd numbers: five, seven, nine.
- Scatter a few marigold petals between the lights.
At night the flames are the pattern and the powder is the frame. This is the rangoli for balconies and corridor doorways, and it works with a reusable rangoli mat set if you want to skip the powder entirely: lay out the pieces and put tealights in the gaps.
Design 5: The stencil border
For a long threshold or a corridor, a repeating border done with a stencil.
Time: 20 minutes for 2 metres.
- Buy a plastic rangoli stencil with a simple repeating motif (paisley, flower, leaf) from any market, or cut one from a plastic folder.
- Lay the stencil on the floor, hold it flat, and sprinkle powder through it with a spoon. Lift straight up.
- Move it along and repeat, aligning the edge of the previous print.
- A single white powder line above and below the border ties it together.
- Tealights at each end and in the middle.
What goes wrong: powder creeping under the stencil edge. Hold it down firmly and use a thin layer.
Keeping a rangoli through five days
- Do not wash the floor near it. Sweep around it.
- Powder rangolis smudge at the edges when walked past. Draw a chalk border 10 cm out and treat it as a fence, or place tealights along the edge, which people avoid.
- Flowers dry and curl in two days. A light mist of water in the morning keeps petals fresh a day longer; replace on day three.
- Diyas drip oil. Put every diya on a small steel plate or in a glass holder. Oil on powder is permanent.
- Wind moves powder. Indoors, near a fan or a draughty door, choose flowers or a wooden set instead.
- Pets and toddlers will walk through anything. A ready-made set is the only version that survives; it lifts off and goes back down.
Removing it afterwards
Sweep powder into a dustpan and put it in dry waste; do not wash it into a drain if it is synthetic colour. Petals go to compost or a plant pot. Rice flour can be swept out for the birds.
Going further
Once the six-petal lotus is comfortable, add a second ring of petals, or change the colour fill to graded shades (dark at the base of the petal, light at the tip). The dot kolam scales up: a 7×7 grid with the same looping method gives a much richer pattern. For what the designs mean and where they come from, read rangoli designs explained. The lights to finish any of these are in Diyas & Lights.